

Douglas Road – Run For The Hills
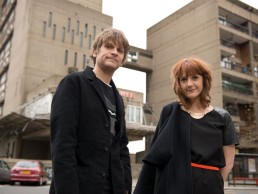
Design duo Anna Burles and Chris Trotman, Founders of design practice Run For the Hills, renovated their London home on Douglas Road during 2020/21. darc asked Burles to provide commentary on their decisions and influences behind the lighting pieces used throughout their home.
During the height of the UK’s national lockdown, Co-Founders of London-based design house Run For The Hills, Anna Burles and husband Chris Trotman decided to renovate their private home.
The couple’s recently renovated, dated Victorian house in West London, was previously set up as two unmodernised flats. It needed to be formally de-converted back into a family home before planning could be granted for a side return and a three-room loft conversion.
The finished house is now a five-bedroom, three-bathroom property, with a stunning design bearing all the hallmarks of the creative duo’s personal style, flair and imagination.
Works began in August 2020 and finished in February 2021, a design-build collaboration with long-time construction partners JNJ Building Services. The team gutted the ground floor completely and reconfigured the layout, removing the double front living/dining room that many people opt for, instead keeping a small adult living room at the front, a small utility/guest bathroom, and then a large open-plan family space at the rear onto the garden, rebuilding all the brickwork to the old part of the house with full width crittal doors in a dark bronze metal.
In keeping with the studio’s design aesthetic for clients, their own home is very creative, cosy, and comfortable for their family-orientated life.
“As we’re designers, we knew we could push things and be innovative and daring, so we let our imagination run riot,” says Burles. “The concept is very personal to us and we spent all of our waking hours and weekends, outside of running the studio, to develop the design and to specify everything needed.”
The house has a stylishly modern feel, with crittal doors throughout the ground floor bringing refined urban styling. The design also boasts dramatic, oversized decorative covings, flower petal ceiling roses, and a vintage-feel but with new herringbone floors, all of which keep the house feeling warm, inviting and full of period character.
Lighting is always an integral part of any design, and as such, darc asked Burles to walk us through the lighting choices throughout her new home.
“Lighting is such a huge part of any interior design and we wanted our home to be lit beautifully. Great lighting needs to be designed carefully into the scheme from day one and it’s utterly transformative and can elevate great design details to be real show-stoppers. As such, we wanted to ensure full control over the lighting in the property to allow for spaces to operate as cosy and relaxing or more task-focused depending on the needs. So, after doing the first cut of the lighting design ourselves, we enlisted the help of a lighting designer and a mood control company to add a smart lighting system to the property, using key pads with tailored settings input to suit the family’s needs with a flick of a switch, allowing maximum control over the light settings in the house.
Lighting Designer Collaboration – GKLD
We had big plans for the lighting in the house to be great – something we’ve learned from our commercial bar and restaurant design work – a great design can be transformed into an amazing, jaw-dropping design with great lighting, so we knew we’d need help specifying the right kind of architectural lights, beam angles, colour temperatures, and optics (which is such a specialist skill). We also had plans to install a mood lighting system in the property, to transform the atmosphere of a room from bright to moody and candle-lit dinner party at the flick of a switch, so we decided we needed to enlist the help of professional lighting designer Guy Kornetzki of GKLD.
Lighting Design Process
Kornetzki sprang off from our initial lighting concepts and decorative CAD lighting and electrical plans (with our initial suggestions of what lights could go where and how we’d like them to be controlled – with all decorative lamps and floor lamps coming on at the same time for example, or a pendant or chandelier being controlled separately). Kornetzki would import our CAD plans and then bounce back ideas to us, confirming the ones he thought we’d got right, and making alternate suggestions. Once we had a range of ideas we all loved, he then calculated and estimated the fittings we’d need, the quantities, where they’d be sited, and how the light would project and highlight what we wanted it to showcase. We’d then run that all by JNJ’s lead electrician, Ben Jenkins, to sense check it from a wiring and load perspective. It’s a technical process and great to have someone who can act as the bridge with the electrical contractor, who can talk knowledgeably about hidden drivers, connectors, and widgets, which make systems and circuits talk to each other.
Choosing Light Sources
I then researched and found the best lamps to use in the decorative lights, wall lights, floor lamps, and table lamps, all of which needed to be intelligent LED dimmers to work well on the lighting system, running my findings by Kornetzki to check. Researching the wattages needed per fitting and finding nice products, which would harmonise an overall colour temperature and mood that was warm not cold. I ended up selecting a mix of G9s and lovely filament and porcelain-style lamps from Tala in warm whites and super warm whites to create a really cosy effect. For the LED strip lighting under the shelves in the kitchen, Kornetzki specified an IP65 rated strip in a warm white 2200k for a comfortable look. All of the architectural downlights were specified by Kornetzki and came from Orluna. They create a really lovely light, in warm white in a variety of beam angles depending on what we want to illuminate. Lights specifically illuminating art were a bit cooler, to keep colours true, but still warm white. Lamps illuminating finishes and upholstery were kept soft and warm.
Mood Lighting System
Kornetzki also helped us research and find our mood lighting controls partner, helping refine the brief, scope and costing, and continued as liaison with them through the life of the project, helping us understand the technical side of the system and how we could get it to work the way we wanted. You wouldn’t believe how much wiring is in the house to control the system, it was like spaghetti junction. It’s expensive, and much more than just having dimmer switches everywhere, but it takes the lighting to a completely different level. We’re so pleased to be able to control the lighting in a really sophisticated, super speedy way.
Some of these mood systems allow you to control the lighting from your phone, and to change the settings of each light source within a scene.
The lighting design was a really close-knit collaboration between us as the main designers, the Electrical Contractor Jenkins from JNJ, Lighting Designer Kornetzki, and the mood controls system team.
Mood Control ‘Scenes’
When designing the ‘scenes’ on the control panel it’s essential to do it at different times of the day, including late into the evening, to make sure you’re getting it right. In most zones we opted for five control settings including: Bright, Dimmed, Moody, Dinner Party Candlelight, Reading Lights-only and Off. Some keypads have double click functionality, switching control to another room, setting it at the same scene you’re using (useful in an open-plan room where you want to set the whole room to cosy, without having to walk over to all of the keypads). Other keypads have press and hold to set a timer for lights to turn off after 10 seconds or so, allowing you to get up the first flight of stairs before they turn off. The ‘All Off’ button by the front door is great for turning off every single light in the house before you leave.
An Artful Design – the art story
One of the big signatures in the house design is the art, which fills so many of the walls and is picked out beautifully by the lighting design. Many of the art prints are by Chris (aka artist Dex) and myself. All of the art was planned and fittings chosen to wash certain sized pieces displayed on walls, fireplace mantels, and on shelves.
Display Cases
Art is also homed in a large, glazed display case-come-curiosity cabinet in the kitchen/diner family room, which was originally designed as a wardrobe, but which we turned into a museum-style display cabinet filled with props, accessories, curios and art. This cabinet also has integrated lighting to make the contents glow as if in an art gallery or museum.
Mission Control
The lighting controls are discreetly hidden on both the ground floor and first floor in pieces of joinery. For the main ground floor hub, we designed a really complex but great understairs set of storage pieces, some of which are fixed and some pull out on wheels to give access to the sizeable Helvar lighting control system and fuse boards behind. The drawers unit has a mix of sizes, including a deep one for kids’ helmets and school bags and then lots of little drawers with labels for small tools, batteries, bike lights, first aid, and sunglasses – literally a place for everything. Then some post racks above for notices from the kids’ school, umbrellas, and other small items that would usually be stashed in a drawer of doom.
House Images: Philip Durrant